
Smartsheet is a spreadsheet-style work management platform that enables you to plan, track, automate, and report on a range of projects. While it’s not a dedicated survey tool, you can still use it to create surveys by building forms that send responses into rows within interconnected sheets.
It sounds a little confusing, but we’ll show you how to create a survey in Smartsheet so that you know exactly what to do. We’ll also cover how to edit surveys in Smartsheet and the tool’s limitations.
And for those who are looking for a more sophisticated front-end survey experience, we’ll introduce you to Jotform, a leading survey tool that works seamlessly in connection with Smartsheet.
How to create a survey in Smartsheet
If you want to create a survey in Smartsheet, you must first understand how the tool uses forms and sheets together.
Technically, there’s no such thing as a “Smartsheet survey.” Instead, you can use a Smartsheet form as a survey. You’ll also need to connect that form to a spreadsheet — you can’t create one without a sheet attached.
Keep in mind that Smartsheet is primarily a paid tool. However, it does offer a free 30-day trial you can use to explore the form feature. After the 30 days have passed, you’ll need to be on the Business, Enterprise, or Advanced Work Management plan to create a form.
Pro Tip
Use the seven tips outlined in our how to create a survey article to get the highest-quality results from your efforts.
Follow these instructions to create a Smartsheet survey form:
- In Smartsheet, open the sheet you want to connect a survey to.

- Click the form icon. Select Create form.
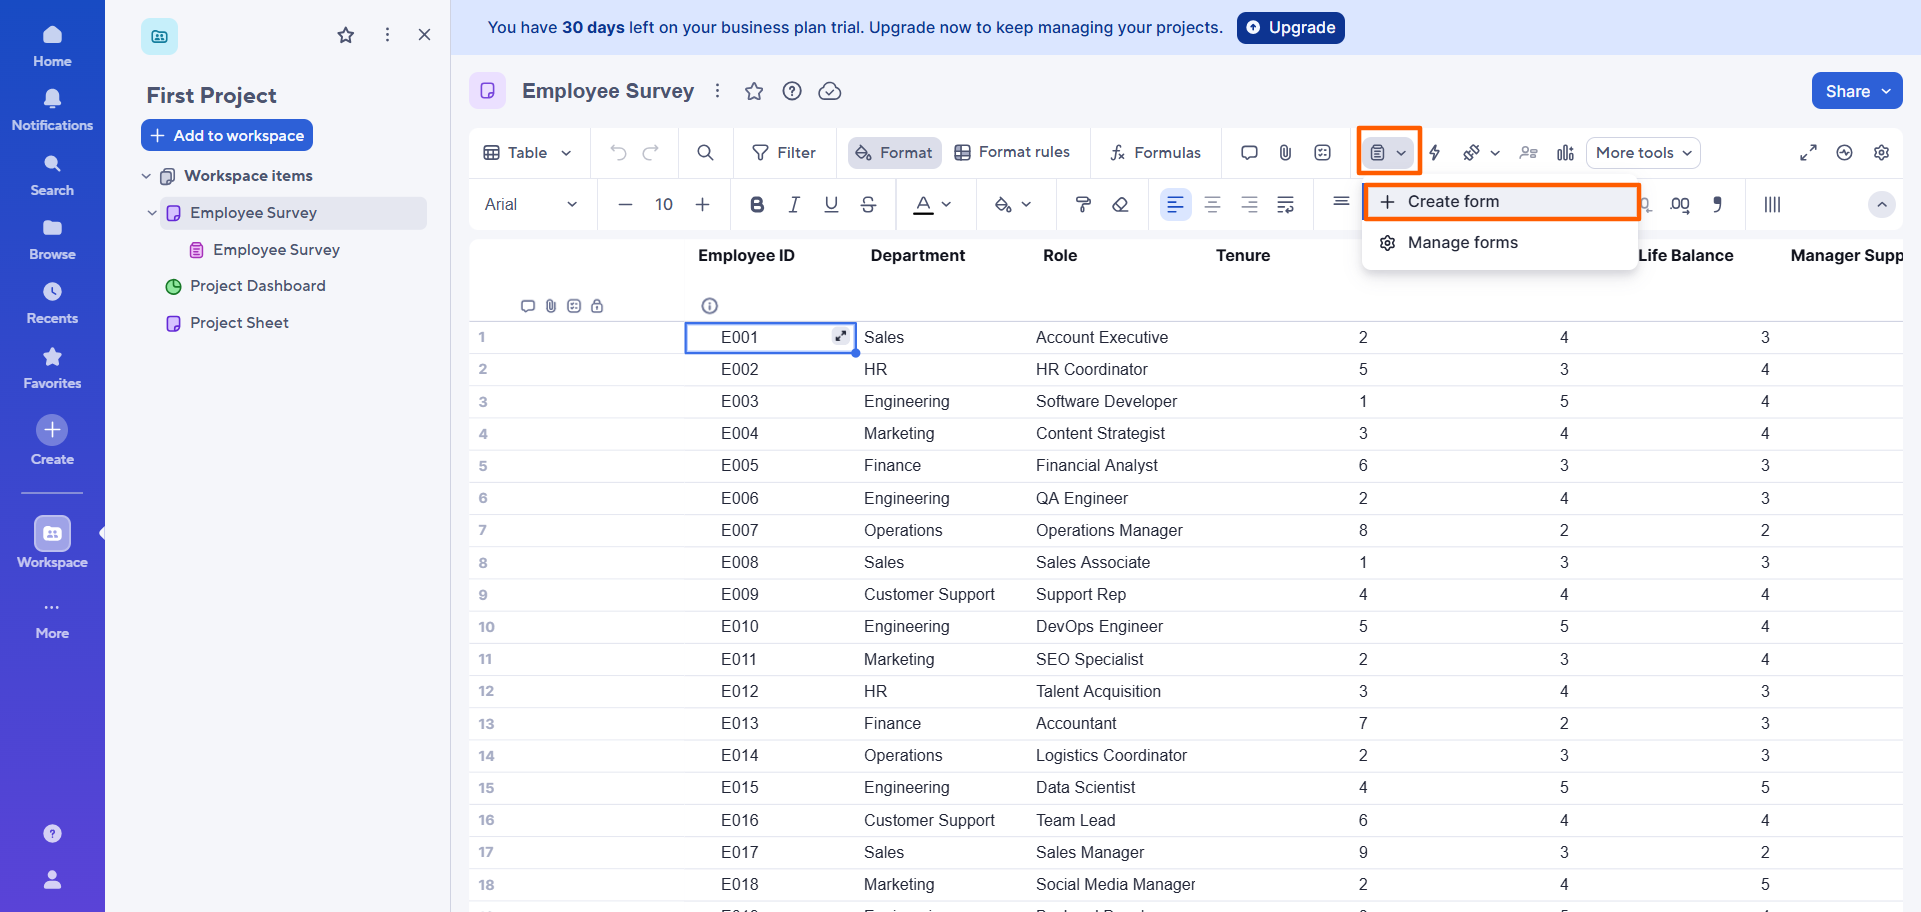
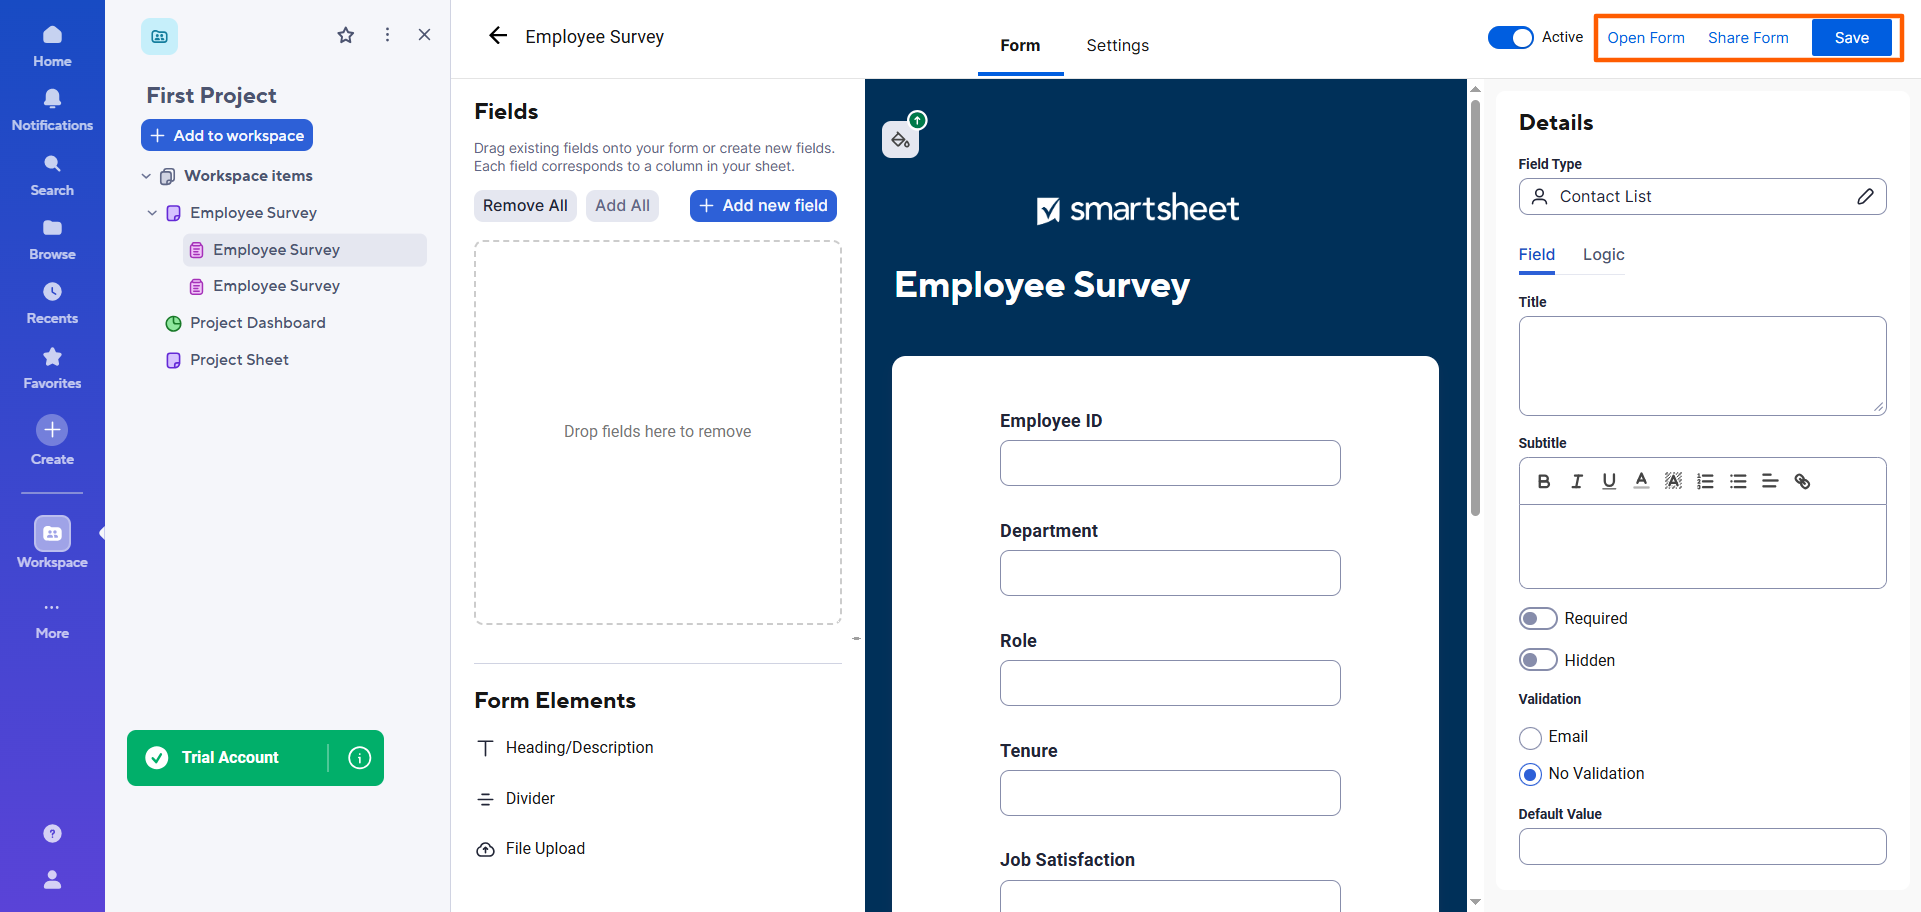
- Smartsheet will open up a form (which you can use as a survey) that corresponds to the sheet in the form builder, with automatically generated fields based on the columns in your sheet.
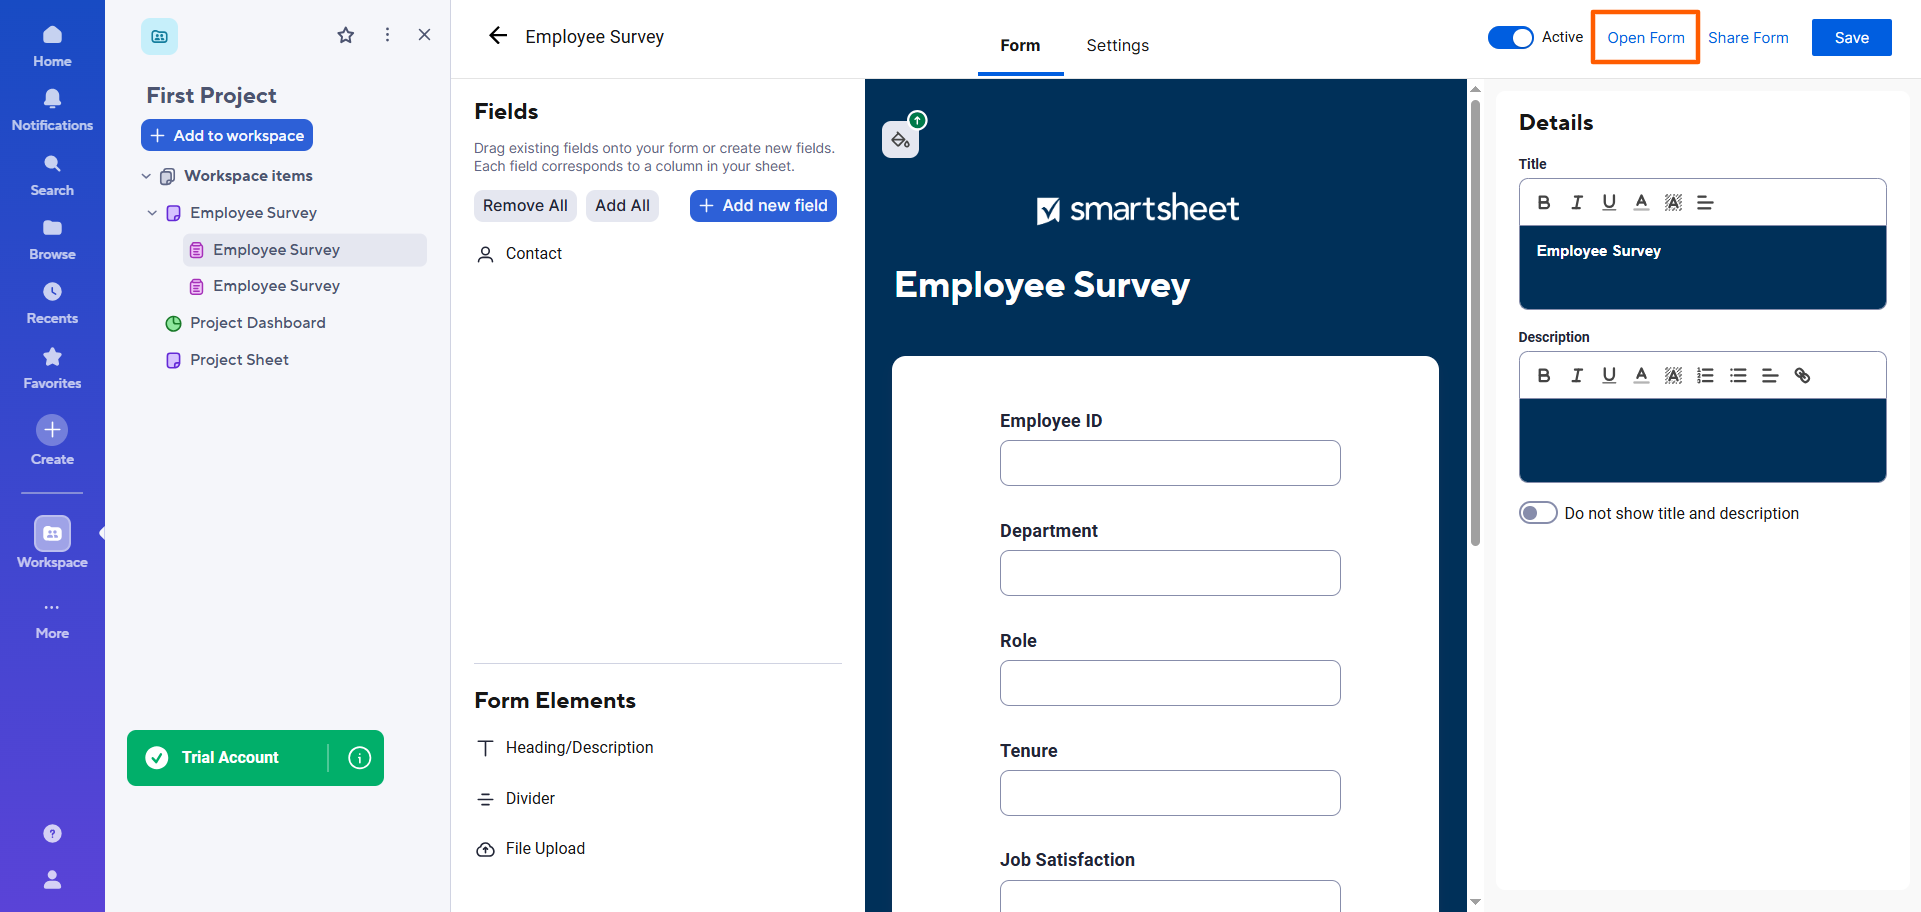
The title of the form will match the title of the sheet. You can click to edit the form title and description in the Smartsheet form builder.
At this point, you can add, remove, or rearrange form fields in your survey. Keep in mind that when you add a field to the form, it’ll also automatically be added as a column to the sheet. However, when you delete a field from the form, the corresponding column will not be deleted from the sheet. You’ll need to delete it manually if you want to remove it.

- Once you’ve completed the changes you’d like to make to the form, click Save.

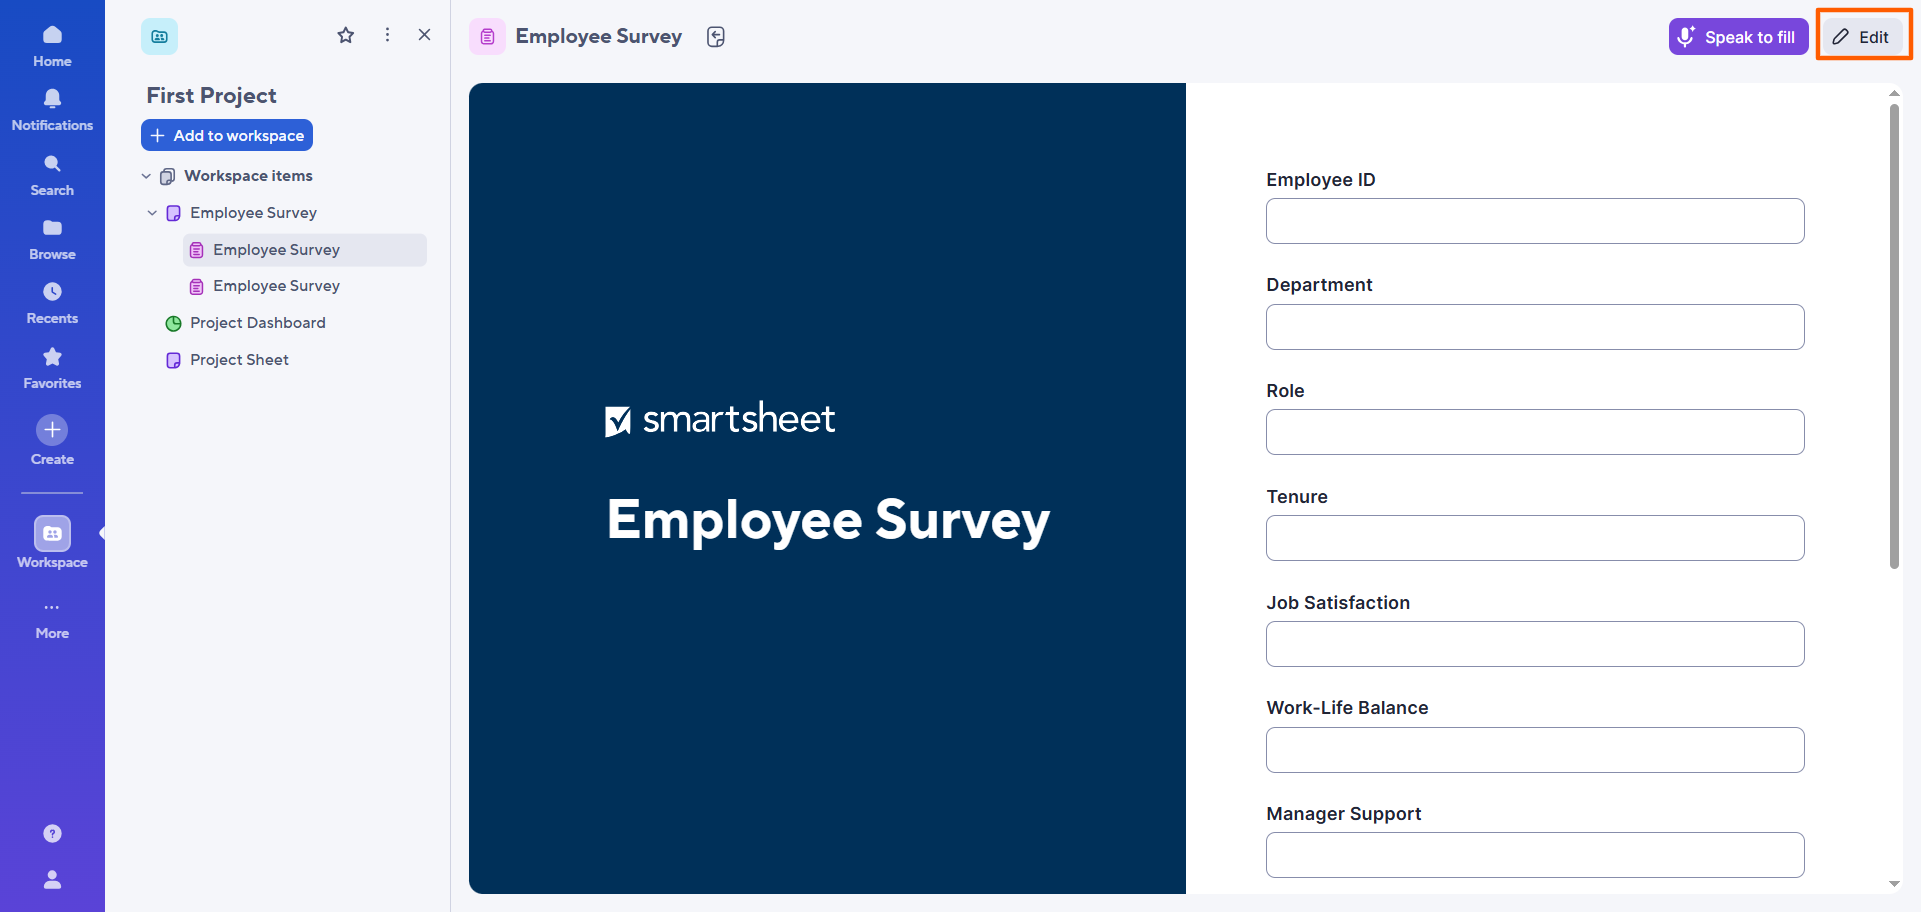
- To preview the form, click Open Form.
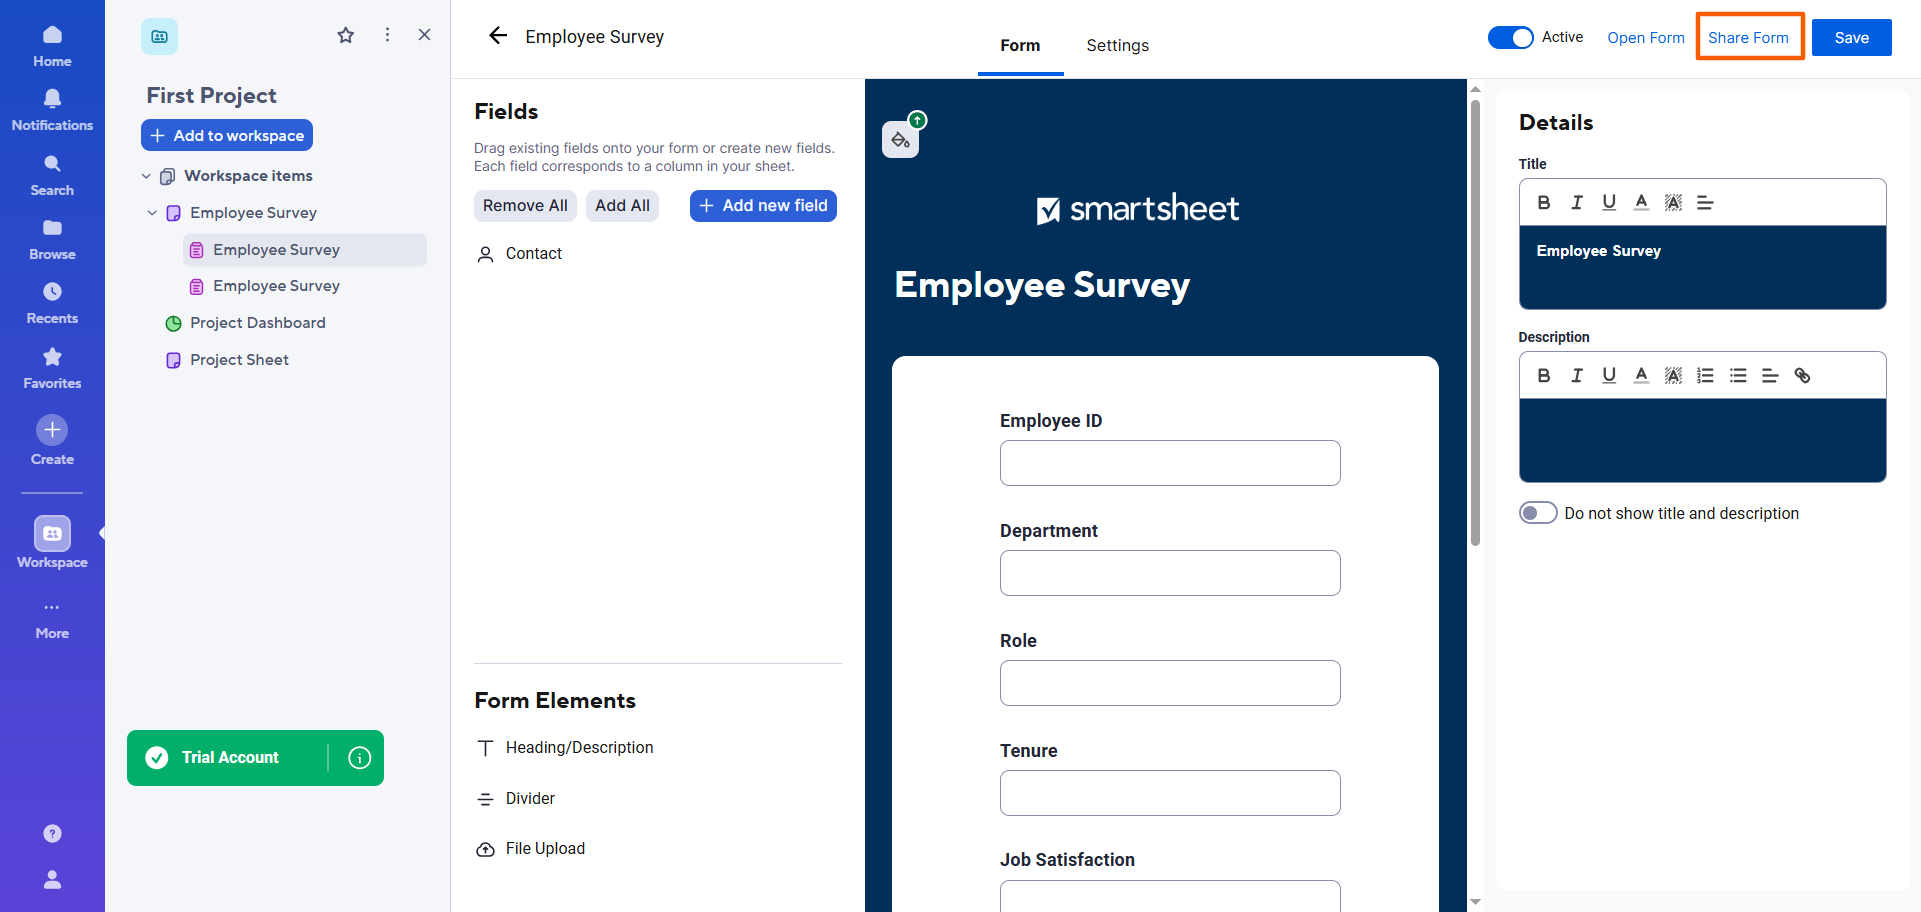
- To share the form with others, click Share Form. You’ll have the option to enter email addresses or get a survey link or embed code.
How to edit and customize a Smartsheet survey
If you need to make some last-minute changes to your Smartsheet questionnaire or survey after you’ve already shared it with others, you can still do so. Just keep in mind that the survey is tightly connected to the sheet structure, so changes to the form will also be reflected in the sheet (in most cases).
Here’s how to find and edit your Smartsheet survey:
- Open the sheet that corresponds to the form you want to edit — in this case, a Smartsheet employee survey.
- Click the form icon. Select Manage forms.
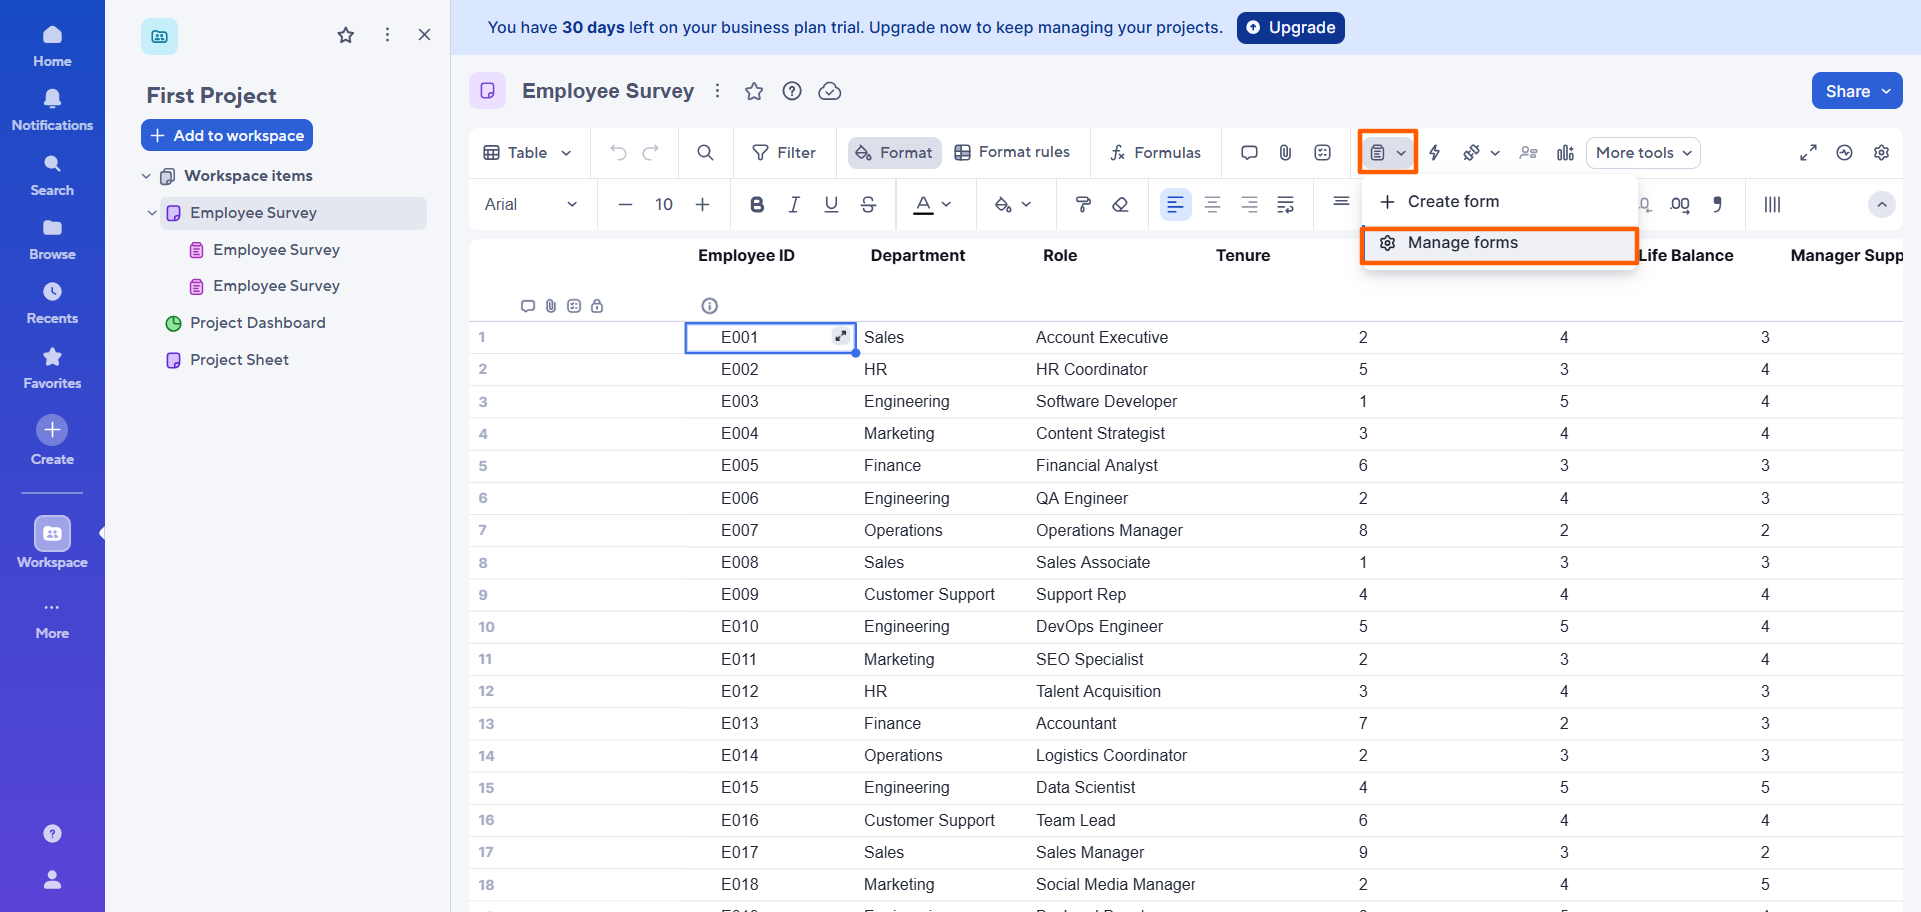
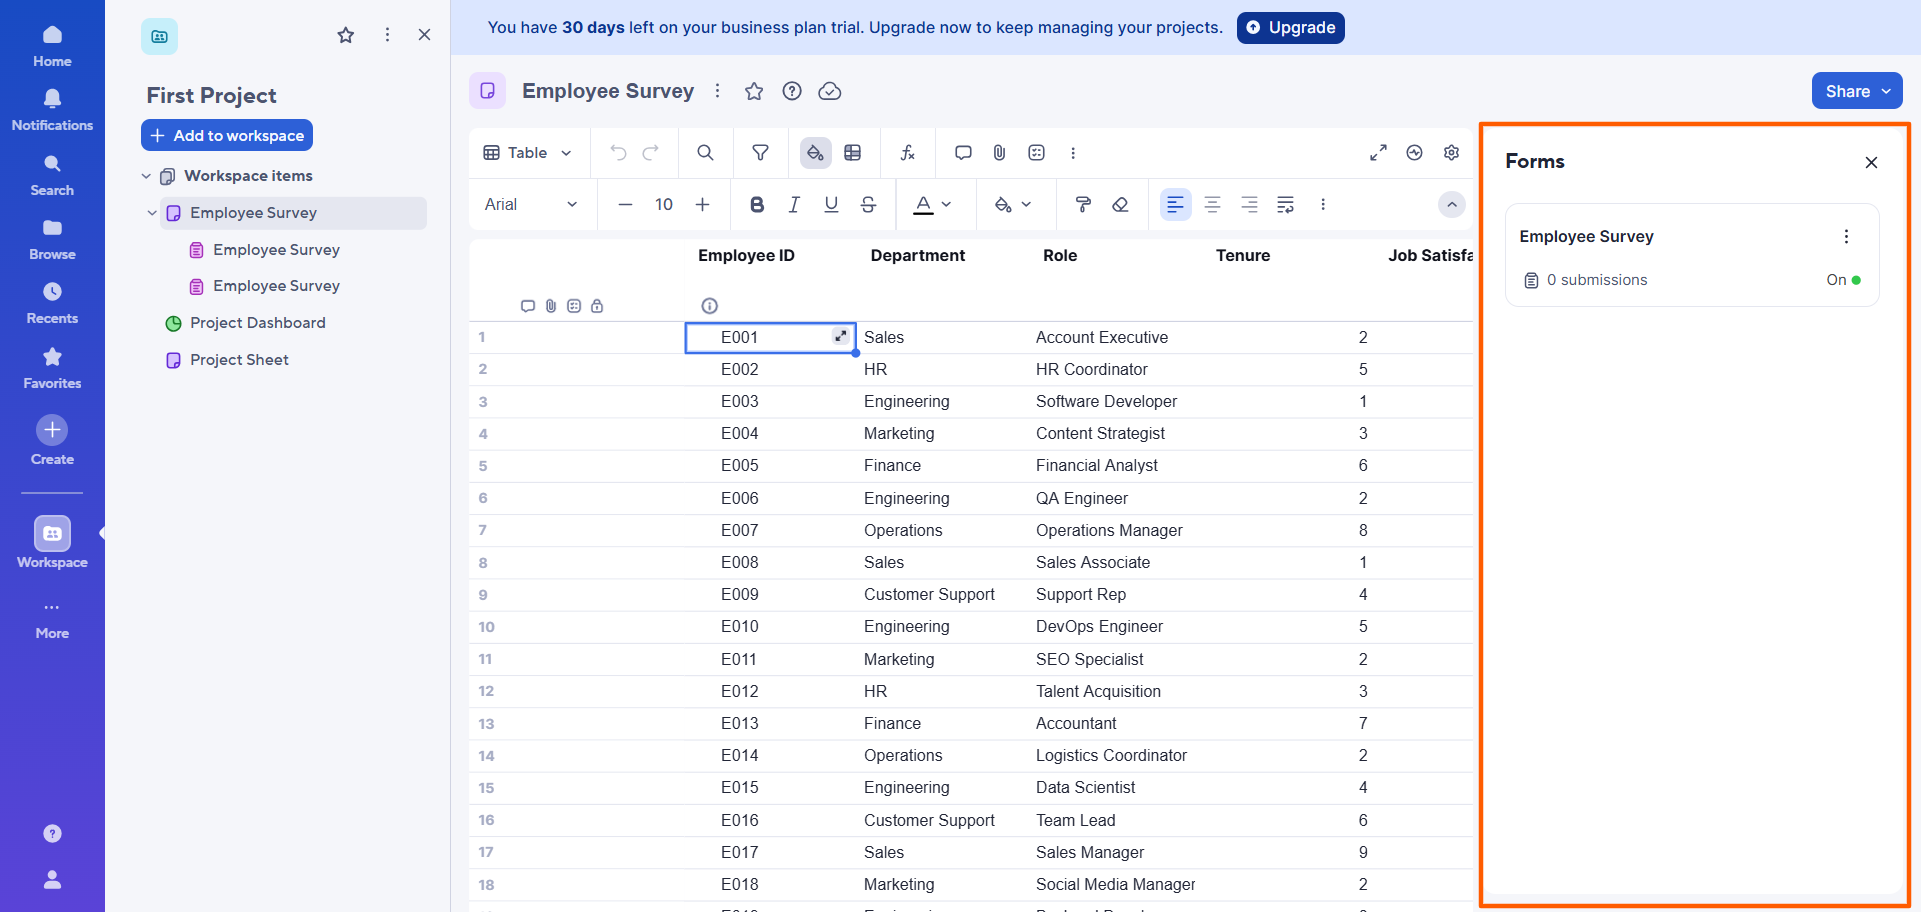
- Smartsheet will open a dialog box with a list of connected forms. Click on the form you want to edit and customize.
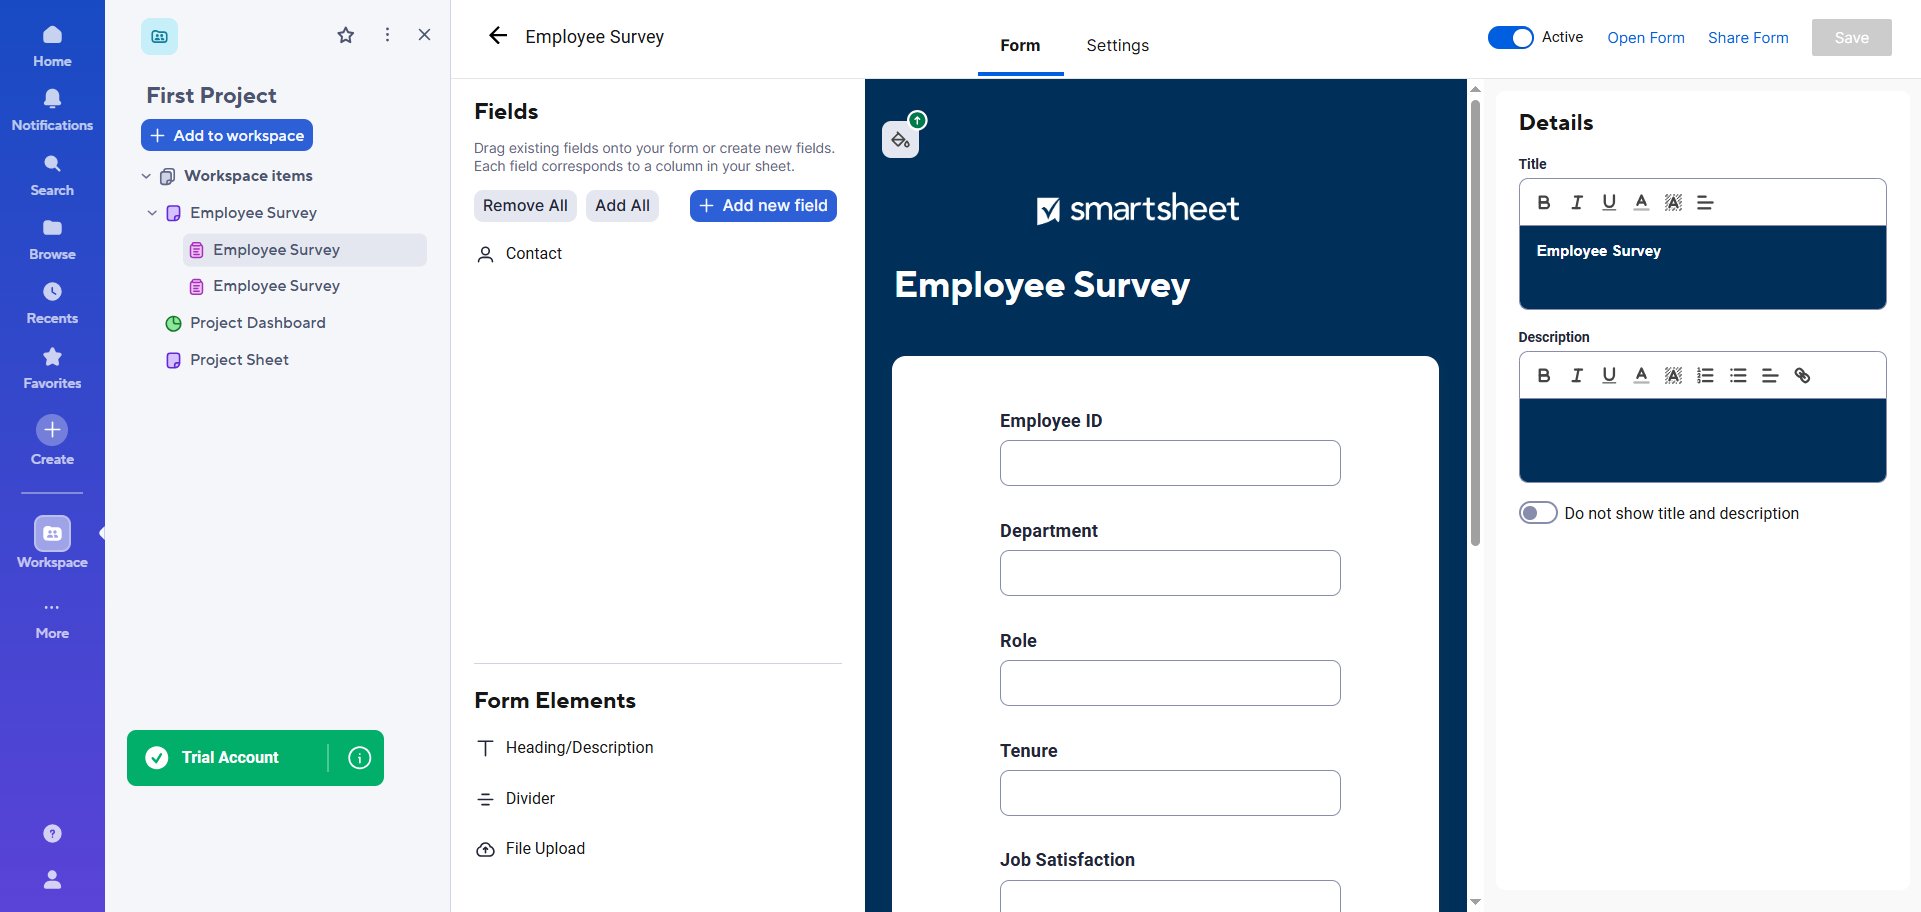
- Click Edit.
- Smartsheet will open the form in the Smartsheet survey tool or form builder.
You can now add, remove, or rearrange fields using the Field menu. You can also adjust field order, edit field visibility, and change the form appearance and labels.
Remember that if you add a field to your survey, it’ll add a corresponding column in your sheet — but deleting one won’t remove it from the sheet.
- Once you’ve completed your edits and customizations, click Save. You can then view the form by clicking Open Form or re-share by clicking Share Form.
Limitations of creating a Smartsheet survey
Now that you know how to create a survey in Smartsheet, you’re probably noticing some limitations of the tool. For example,
- There are no dedicated survey features in Smartsheet: Smartsheet enables you to create forms, and you can also use this functionality to create basic surveys. However, it can’t create surveys specifically, which can be a limitation in some use cases.
- All Smartsheet forms are connected to sheets: You can’t create forms or surveys without connecting them to a sheet.
- Design customizations are limited: Because Smartsheet isn’t a dedicated form or survey builder, it doesn’t have the advanced functionality to create attractive, professional-looking surveys that match your business.
If you want to create basic surveys that connect to sheets, then Smartsheet can do the job. But if you want a more flexible front-end survey experience that’s customized to your branding, you need to use a dedicated survey builder that can sync collected data into Smartsheet. This way, you get the best of both worlds: an advanced survey building experience coupled with the powerful work management capabilities of Smartsheet. It’s a win-win.
A better survey experience: The Jotform and Smartsheet integration
Whether you need to create a Smartsheet employee survey or a Smartsheet feedback survey, it’s important to have the right tool for the job. That’s where Jotform comes in.
Jotform is a dedicated survey builder that natively integrates with Smartsheet to send all survey responses into the work management platform automatically. Here’s what the process looks like when you use Jotform and Smartsheet together:
- Build your survey in Jotform: Jotform comes with over 20,000 form templates — including hundreds of survey templates like customer service surveys and employee onboarding feedback surveys. Simply choose one that aligns with your needs and customize it in Jotform’s powerful survey builder.
- Connect Jotform to Smartsheet with the Smartsheet integration: With Jotform’s native Smartsheet integration, connecting your form with Smartsheet takes a matter of minutes and doesn’t require any coding or third-party tools. (Jotform also offers more than 150 integrations to other tools you likely have in your tech stack, like Google Sheets, Slack, and Asana.) Here’s how to integrate your form with Smartsheet in a few easy steps.
- Automatically send each survey submission into Smartsheet as a new row: With the Jotform–Smartsheet integration in place, new survey submission data automatically goes to Smartsheet as new rows in your sheet.
- Keep Smartsheet as the backend data destination while using Jotform to improve the survey experience: You get the best of both worlds when you use Jotform and Smartsheet together — advanced surveys and powerful work management tools.
Pro Tip
Collected survey data but don’t know what to do with it? Learn how to analyze survey data like an expert so you can turn raw information into actionable insights.
Build smarter survey workflows with Jotform and Smartsheet together
Now that you know how to create a survey in Smartsheet, you have a better idea of when this tool works — and when it doesn’t. If your goal is simply to gather basic, structured data for the purposes of storing it in a spreadsheet, then Smartsheet does the job well. But if you need a more sophisticated front-end survey experience with advanced functionality — perhaps you’re trying to survey customers rather than employees — it’s best to use a dedicated survey tool like Jotform.
With Jotform, you can create highly customized surveys that look and feel like the rest of your business. Better still, it offers a native integration with Smartsheet. This way, you can keep Smartsheet as your system of record by automatically sending all survey responses into the work management tool. Using the two together, you can create a streamlined data collection and data management experience.
Explore Jotform and see how easy it is to create a survey, connect it to Smartsheet, and automate row creation for every single response. Get started for free today.
This article is for Smartsheet users, operations teams, project managers, HR teams, customer feedback managers, and anyone who wants to create basic surveys in Smartsheet or connect it with Jotform for a more flexible survey-building experience.


Send Comment: